Follow the four setup steps
1
Team: add yourself or your professionals
Enter the name customers should see, choose working days and set hours. Add separate periods for breaks or choose different hours for individual days. Save and add another adds more people in the same flow. Choose Save and continue when ready.
2
Service: create the appointments you offer
Enter the name, duration and price, then select the professionals who provide it. Leave the price at 0 for your first test. Use Add professional if someone is missing; your service details stay in place. Use Save and add another for more services, then Continue to booking page.
3
Booking page: publish your customer link
Turn on Accept appointments, choose a Business URL, and add your page content. Set Search visibility to Public or Unlisted, rather than Draft. Check Preview business page, then choose Continue to design to save the page. Learn about hosted pages.
4
Design: make the calendar your own
Update your accent color, corners, text or language while checking the live widget preview. On a phone, use Edit design and Preview to switch views. Choose Save design and finish, or Use current design to keep the appearance you already have.
Make a free test booking
Open your published hosted booking page, choose a service and time, enter an email address you control, then confirm. Check Calendar and make sure the time is unavailable for that professional. A zero-price service skips payment. The design preview creates no appointment or email, so use the published customer page for this test.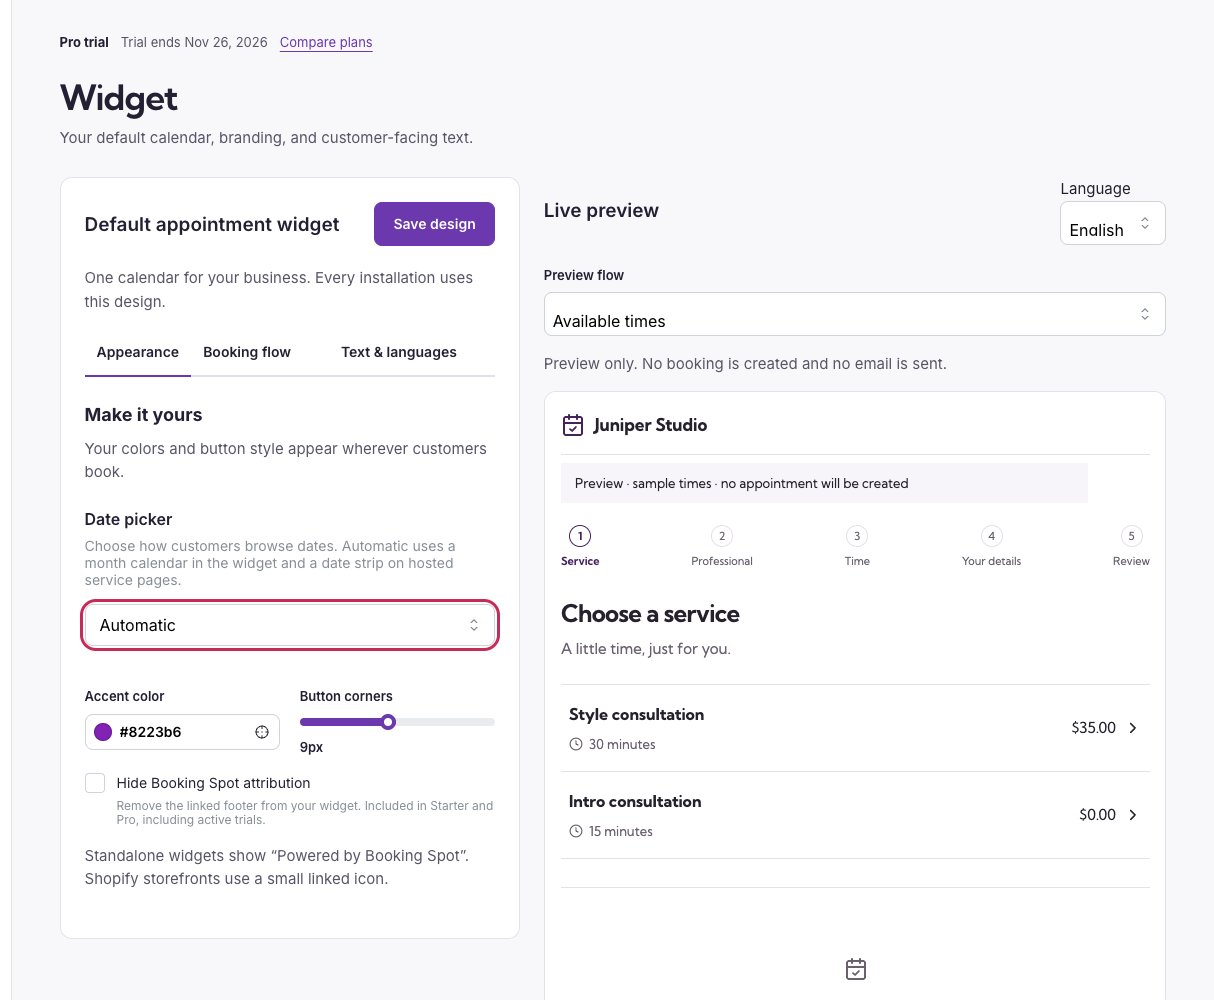
The same live widget preview is used during setup and on the Widget page.