Open Settings → Business and policies. Change the options you need, then click Save settings. Adding a resource or ticking a checkbox does not save the page by itself.

Business details

Booking policies
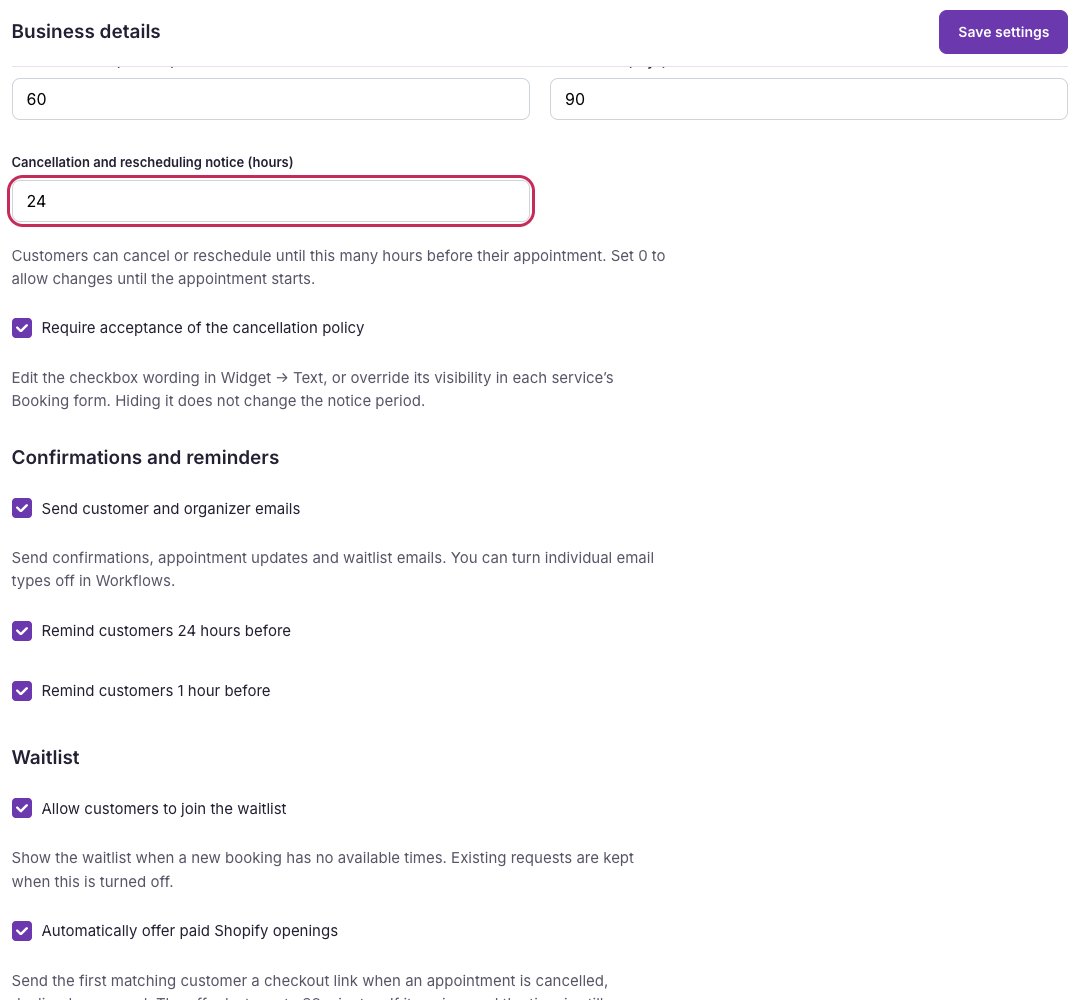
Business booking policies with the cancellation and rescheduling notice field circled.

Set the booking window and change deadline, then save. The circle marks the change deadline.

The notice applies to both cancellation and rescheduling. Existing appointments keep the notice saved when they were booked. Hiding the policy checkbox does not change that deadline. Change its wording in Widget → Text & languages; search for Policy. The dashboard can handle customer changes that are outside the self-service window, subject to availability.

Emails and reminders

Send customer and organizer emails is the delivery master switch. New workspaces have it on; existing workspaces keep their saved choice. Choose Remind customers 24 hours before, 1 hour before, or both, then save. Reminders require Starter or Pro. Use email setup for individual message switches, plan restrictions and delivery checks. Turning emails off does not stop customers from booking.

Waitlist options

Pro, including an active Pro trial, unlocks these controls:
  • Allow customers to join the waitlist shows signup when a new booking has no available times on the selected day. Turning it off keeps existing requests.
  • Automatically offer paid Shopify openings enables timed private checkout invitations for eligible paid Shopify services. Customer emails and the Opening available workflow must also be enabled.
See waitlist and recovery before turning on automatic invitations.

Rooms and equipment

Under Rooms and equipment, enter New resource, click Add resource, then Save settings. Select that resource under Services → Service setup → Required resources for every service that needs it. One resource allows one appointment at a time, even across different professionals. See availability for an example. This editor currently adds named resources; it does not provide a separate room-calendar or resource blackout editor. To stop a service using a resource, remove its resource assignment and save the service.

Start or pause new bookings

For a Shopify workspace, use Settings → Shopify storefront → Accept appointments. Without Shopify, use Settings → Hosted pages → Accept appointments. The same switch is also available in onboarding. Add a service and a professional with valid working hours first, then save. Pausing bookings keeps existing appointments. Use Holidays and closures for scheduled closures instead of manually toggling the calendar every holiday.