Create a booking product template
1
Choose the theme
Open Set up Booking Spot → Shopify, or Settings → Shopify storefront after onboarding. Choose Theme to set up. Live is the published theme; Draft affects preview only. Click Open theme editor. The refresh button reloads the theme choices.
2
Create a separate product template
At the top of Shopify’s theme editor, open the page selector, choose Products → Create template, name it
booking-spot, and base it on Default product. Save. Return to Booking Spot, click Refresh templates and select it under Booking product template.3
Add Booking selector
Click Add Booking selector. Shopify opens the selected product template with the block ready to preview. Choose Display → Embed to show the calendar on the page, or Button to open a booking dialog. In Button mode, optionally enter Button label. Click Save in Shopify.To add it manually, use Add block → Apps → Booking selector in a supported product section. If the product section cannot accept app blocks, use Add section → Apps. Drag the block where you want it and save.
4
Replace the usual purchase controls
On the booking template, hide or remove Price, Quantity selector and Buy buttons, including Add to cart and Buy it now. Turn off sticky purchase controls for this template if your theme has them. You can hide the variant picker when the booking widget handles your appointment options. Keep the title, description and images.Keep the actual Shopify variant prices. Hiding a theme Price block does not remove or change the price charged at checkout.
5
Confirm, design and publish
Back in onboarding, confirm I saved the Booking selector in this product template, then continue to Design. Click Publish there and select the same Product template in the product options. Review and publish the service product.After onboarding, open Services → [service] → Shopify settings to select the template and Review update → Update product. For a manually linked product, set Theme template on the product in Shopify Admin, then save.
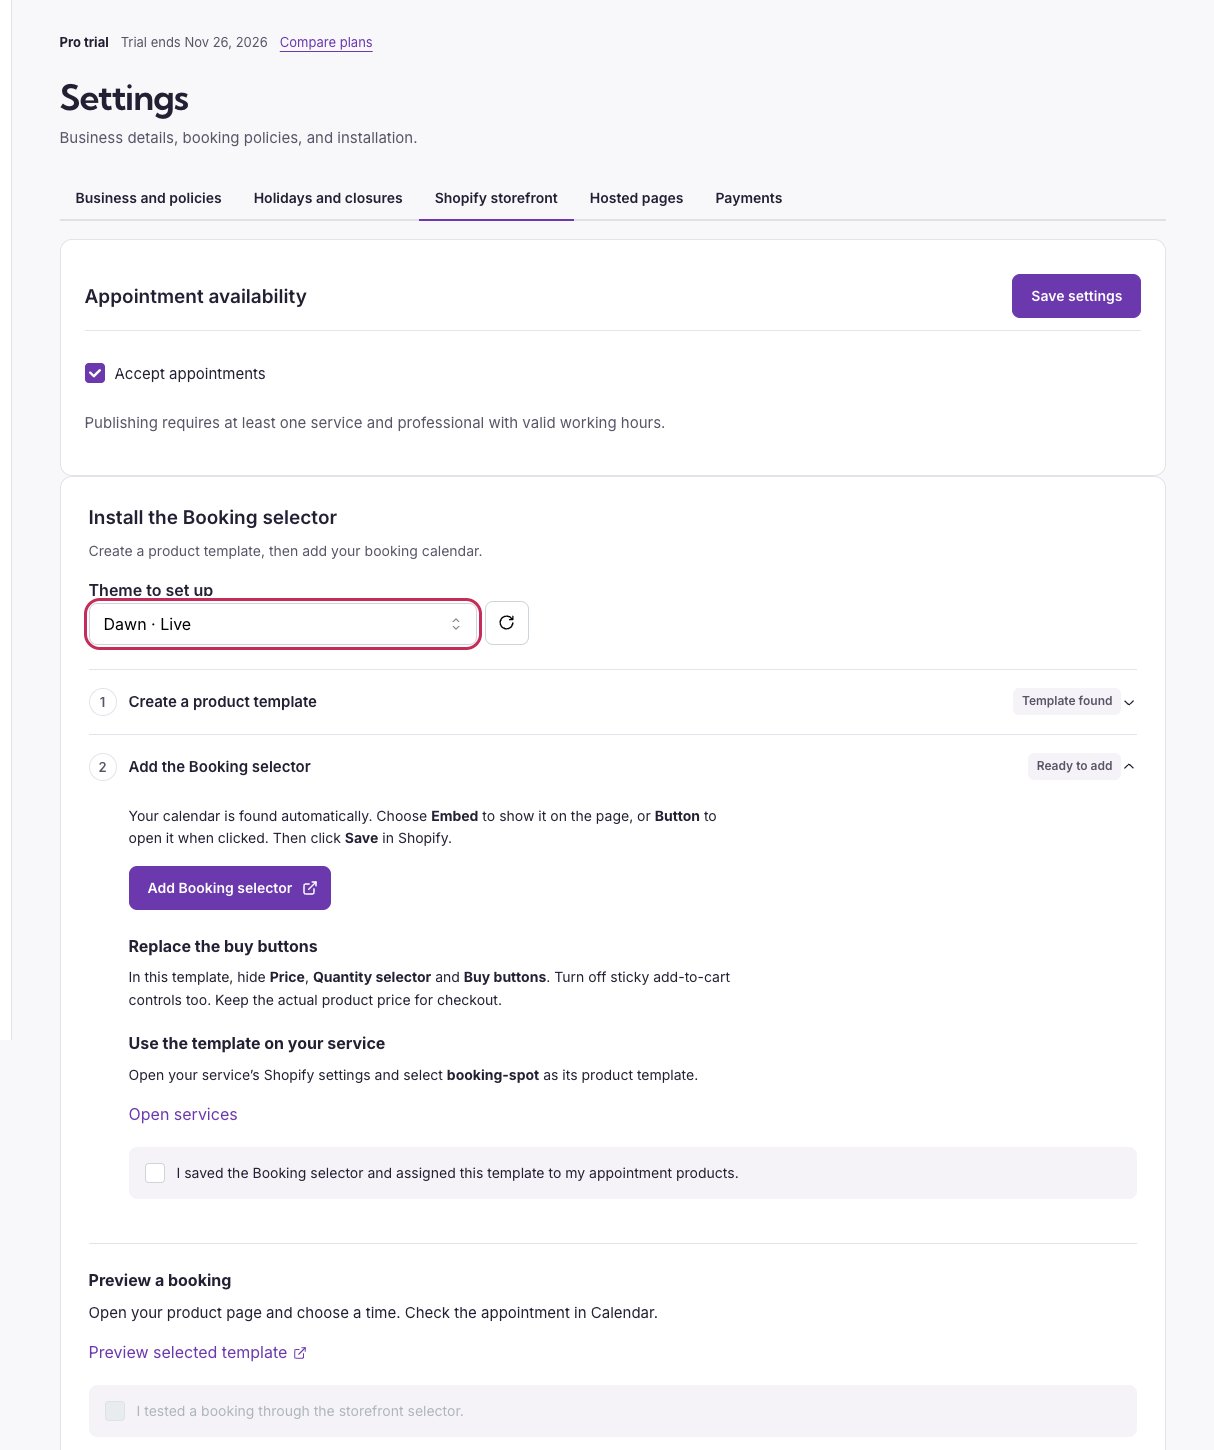
Choose the theme, create its product template, then add the selector. The highlighted theme controls choose where the changes are made.
Booking selector options
The selector has no title, calendar URL or Booking page ID fields. The current product ID and store connection find the service; widget branding and language come from Booking Spot → Widget. With one service and professional, booking-flow shortcuts can start at the date/time picker.
Preview the right product
In the Shopify theme editor, use Preview → Change to choose a product linked to a Booking Spot service. Previewing a template does not assign it to that product. Save the template and product assignment separately. On the storefront, check:- The selector appears on the intended appointment product.
- It shows only services/options linked to that product.
- Choosing a time reaches the expected review and checkout/cart flow.
- Required waivers and policy consent remain visible.
- Desktop and mobile both work, and ordinary merchandise retains its normal purchase controls.
Add an appointment calendar to a page
Use Appointment calendar for a general calendar on your homepage or a dedicated booking page. Open that page in the theme editor, choose Add block → Apps → Appointment calendar or an Apps section, then save. This block shows your business calendar rather than restricting it to the current product.
Embed in Booking selector is a display choice, not Shopify’s separate App embeds panel. Both Booking Spot tools here are app blocks. Shopify explains how to add and move app blocks.
Change themes or remove a block
When changing the live theme, add the booking template and block to the new theme and verify the product assignment again. To remove the selector, select it in the theme editor, choose Remove block and save. Do not leave a bookable product with a normal purchase button that bypasses time selection.Troubleshoot the selector
Shopify’s template guide covers creating, previewing and assigning templates. See Shopify payment setup for product options and paid tests.