Publish a service as a Shopify product
- Assign a professional with working hours in Team.
- Open Services → Add service. In Service setup, enter the service name, duration, and price. Choose Shopify checkout under Payment collection. Add appointment options if customers can book different durations or prices. Assign the professional and click Save service.
- In Settings → Shopify storefront, enable Accept appointments and save. Create a dedicated booking product template with the Booking selector and make that template available in your live theme.
- Open the service’s Shopify settings tab. Select sales channels, any manual collections, the Shopify location, and the product template.
- Click Review and publish. Check the sales channels, template, and variant prices in the confirmation box, then click Publish product. Booking Spot creates one product with a Shopify variant for each appointment option.
- Use View product page to check how customers book or Open in Shopify to view the product in Shopify Admin. After editing prices or appointment options, save the service, then use Shopify settings → Review update to sync the existing product.
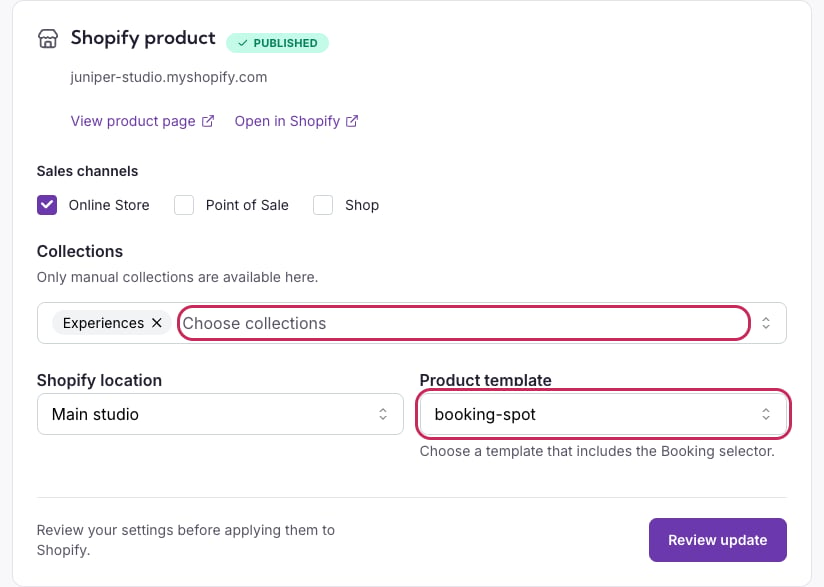
Choose where the Shopify product appears and which template customers see.
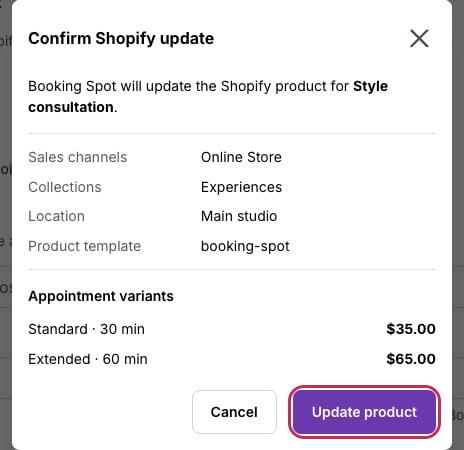
Review the Shopify settings, durations, and prices before committing an update.
Product publishing options
Available on Free: publish or link your one active service and take payments through Shopify checkout. No paid subscription is required. Starter and Pro support multiple active services.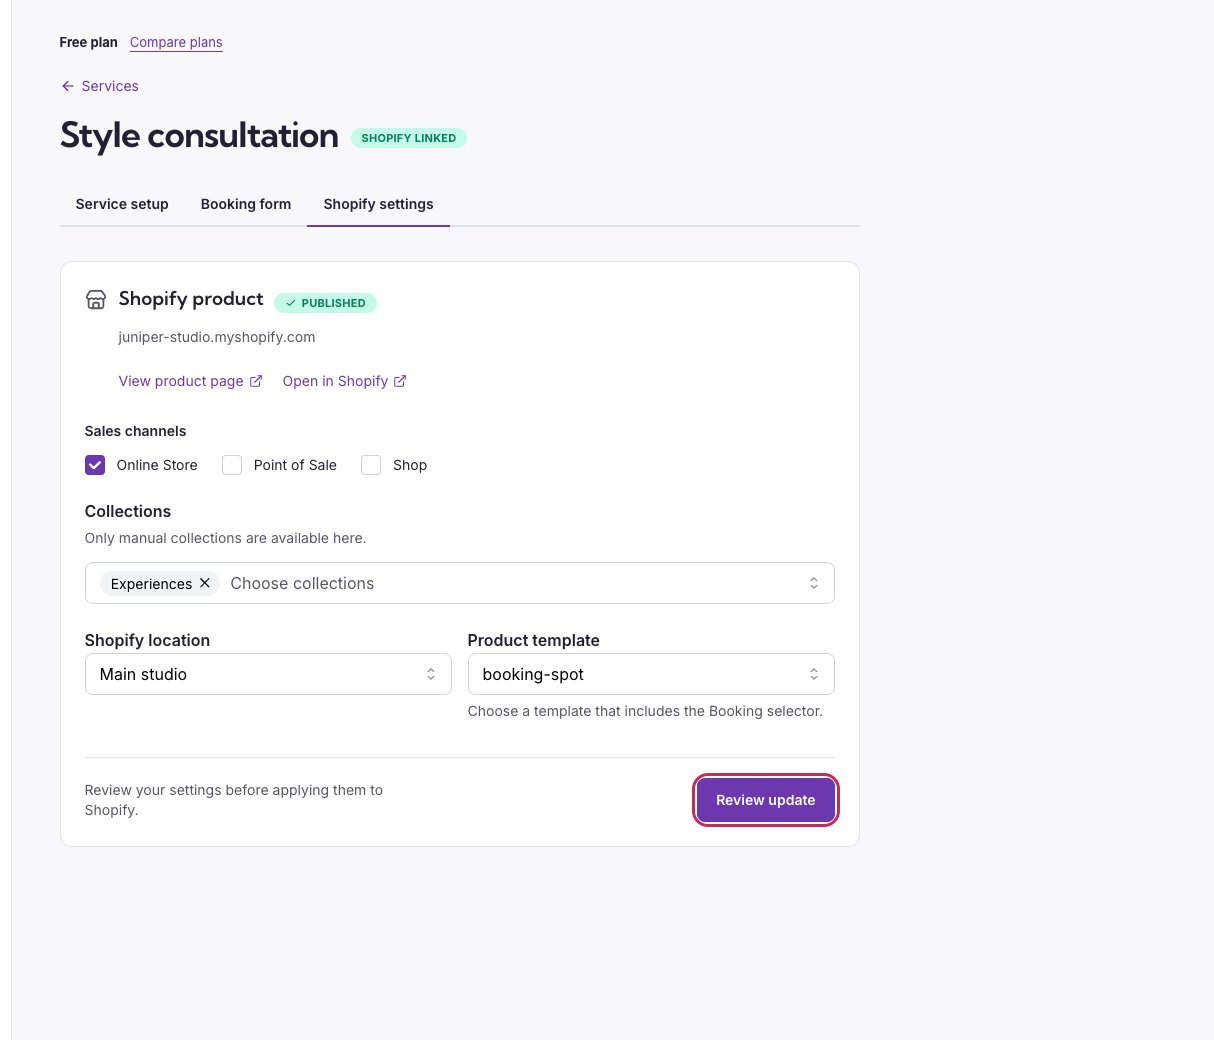
Shopify publishing stays available on Free.
To change product details, update and save the service first, then review the Shopify update. Changing a selection in the options form alone does not update Shopify. A Shopify update needed badge indicates prices that need syncing. If an update succeeds but the page cannot refresh, reload before trying again to avoid creating a duplicate action.
Appointment duration and price options
Starter or Pro is required for additional options. In Service setup, choose Shopify checkout. Enter Default option name, such as Standard, then Add option for another duration or price. Each option has Option name, Duration (minutes) and Price. The remove icon deletes an added option. The base service is the first option; up to 24 additional options are available. Save the service, then review and publish/update the product. Each option maps to its own Shopify variant and uses the service’s team, resources and booking limits.Collections, locations and appointment addresses
A collection organizes products in Shopify. A Shopify location is a Shopify inventory/fulfillment setting. A Location label, Appointment location and street address under Settings → Hosted pages describe where a customer attends. A resource under Business and policies → Rooms and equipment prevents shared-room conflicts. These controls serve different purposes; selecting a Shopify location does not create separate availability for a branch.Link an existing Shopify product
For a service with a single fixed-price variant, open Shopify settings → Link an existing product. Enter its numeric product and variant IDs and click Save product link. Match the same price and currency in Service setup.Choose how customers reach checkout
Go to Booking Spot → Settings → Payments. Choose a Shopify purchase flow, then click Save settings. This applies to paid Shopify services on the storefront.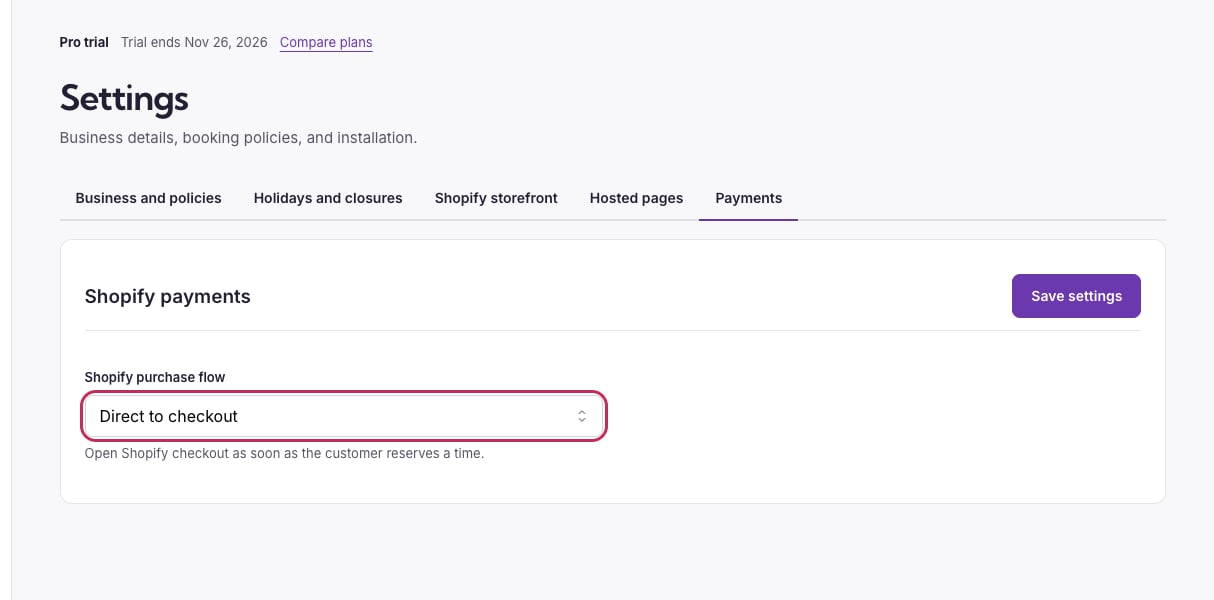
Change the purchase flow in the Payments tab.
- Direct to checkout
- Add to cart
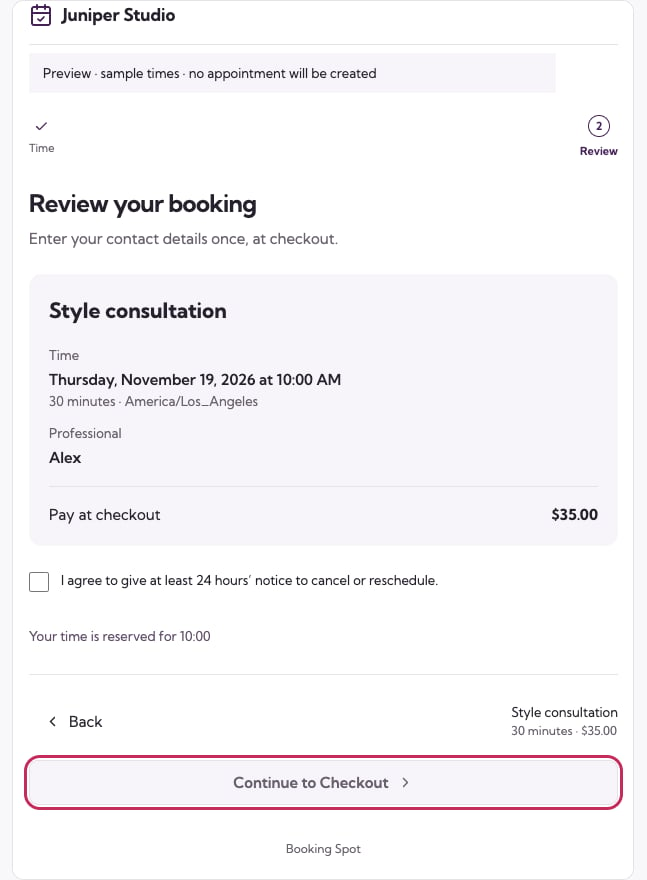
The appointment review opens Shopify checkout.
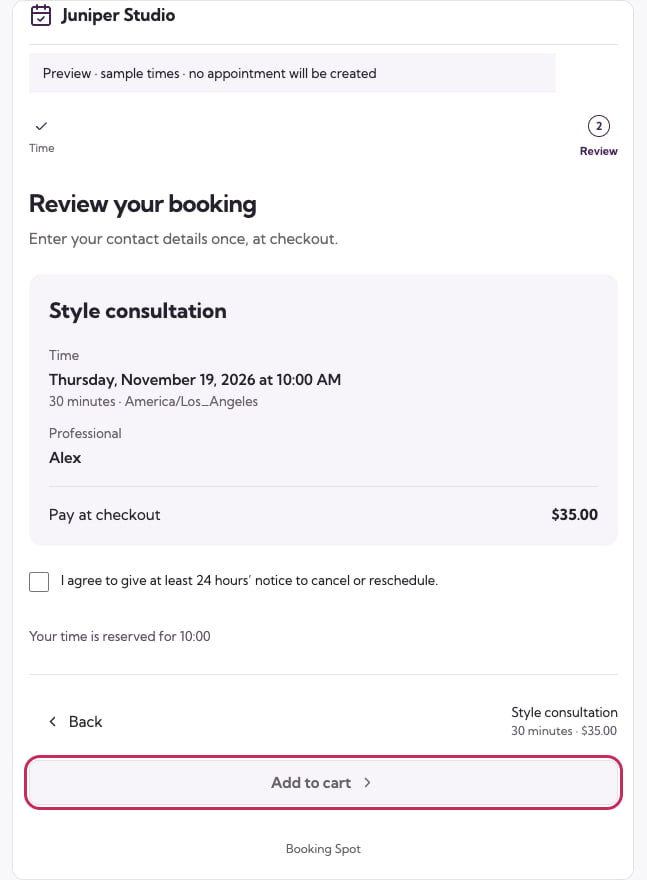
Verify a test order
- Use a Shopify development store or a store with a test payment gateway enabled. Confirm that the paid service appears on a draft theme’s appointment product.
- Choose a time with the professional and review the appointment. With checkout contact collection enabled for an eligible paid Shopify booking, name and email are entered at checkout; required questions and consent remain in the widget. For Add to cart, add a regular item first so you can verify both items appear together in the cart. If the widget asks for contact details, use the same email there and at checkout. Checkout must collect an email address for booking confirmations.
- Pay using test details before the reservation expires. Find the paid order in Shopify Admin → Orders, then check the appointment in the Booking Spot Calendar. If the service requires approval, look for a pending appointment and approve it. If confirmation emails are enabled, verify the customer receives the email.
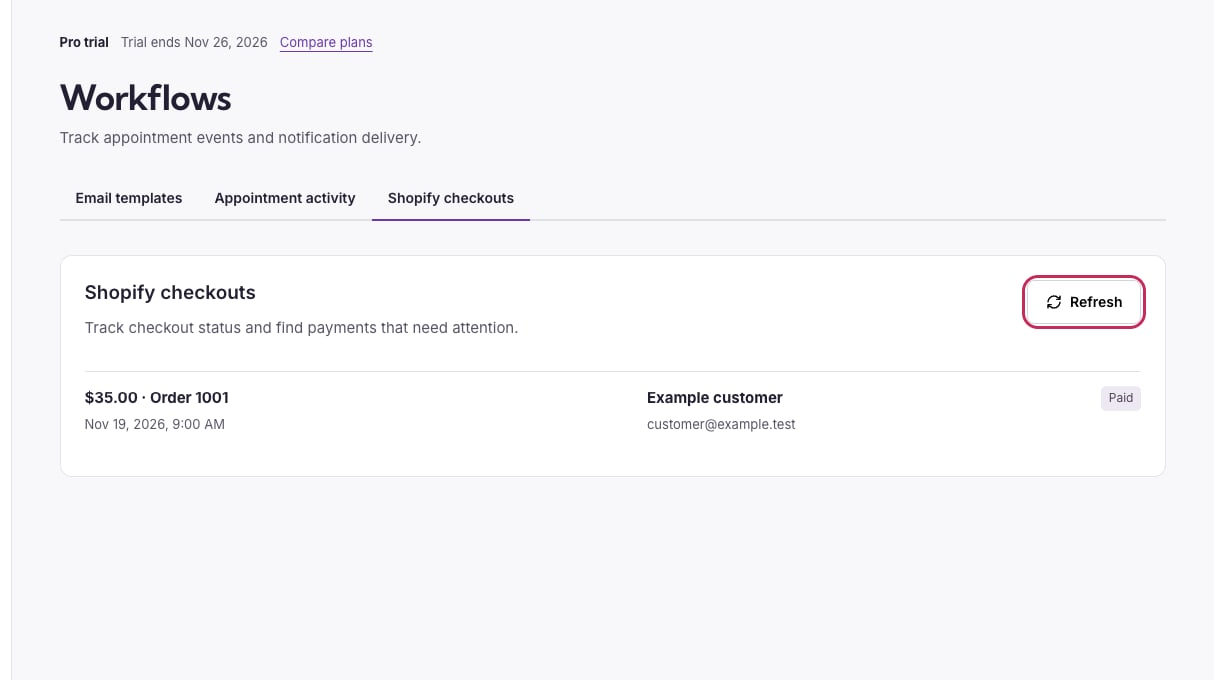
The Shopify checkouts section in Workflows shows the matched order and payment status. This example uses simulated orders.