Add a professional
1
Enter their name
Open Team → Add professional. Enter Name as you want it to appear to customers.
2
Set recurring weekly hours
In Weekly hours, add a start and end time for each working day. Use Add hours for separate shifts or breaks. For example, 9 a.m.–noon and 1–5 p.m. leaves lunch unavailable. Remove every period on a day to make it a non-working day.
3
Save and assign services
Keep Accept bookings on and click Save professional. Open Services, select the person under Professionals, then Save service. A professional without assigned services cannot be booked. Each day supports up to four ordered, non-overlapping working periods.
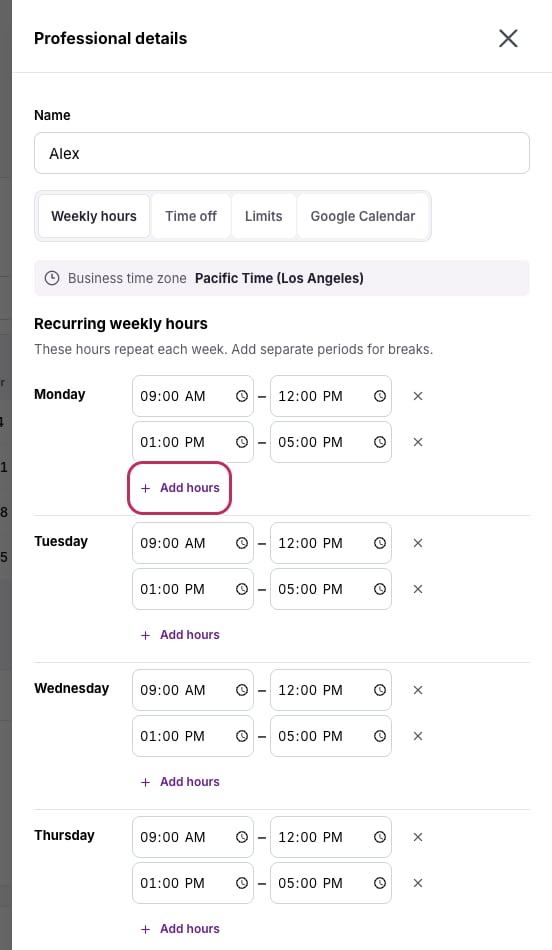
Weekly hours repeat. Add a second working period to leave a break between shifts.
Plan a month or three months
- Open Team and choose Professional above the schedule.
- Choose Month for daily hours or 3 months for a wider overview. Use the arrows or Today to move through dates.
- Select a date. The details below show weekly or adjusted hours, time off and business closures. In the three-month view, colored markers identify exceptions; select the day for details.
- Click Edit date hours. Add, remove or change periods for that date, then Save date hours. Removing every period makes that date unavailable. Cancel abandons the edit.
- For a date already adjusted, use Use weekly hours to remove the exception and return to the repeating schedule.
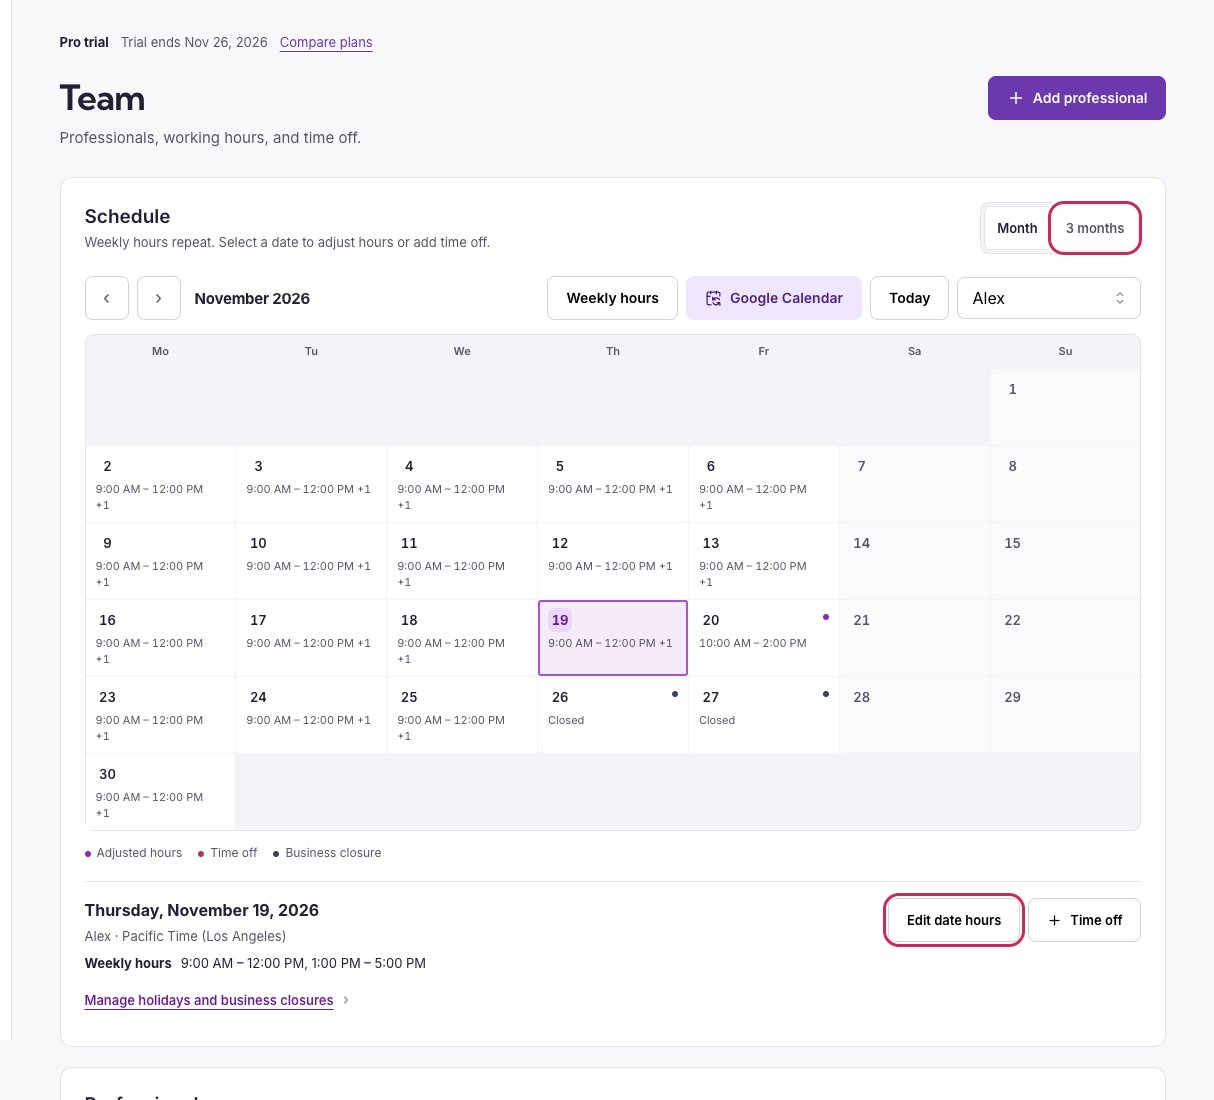
Choose a professional and date to review or change that day's schedule.
Block one person’s time off
In the date details, click Time off, or open the professional and choose Time off. Choose full-day dates for vacation, or uncheck All day for a shorter absence. For full days, enter First day off and Last day off; for a partial day, enter Starts at and Ends at, click Add time off, then Save professional. Full-day dates include the last selected day. Times and dates here use the business time zone displayed in the editor.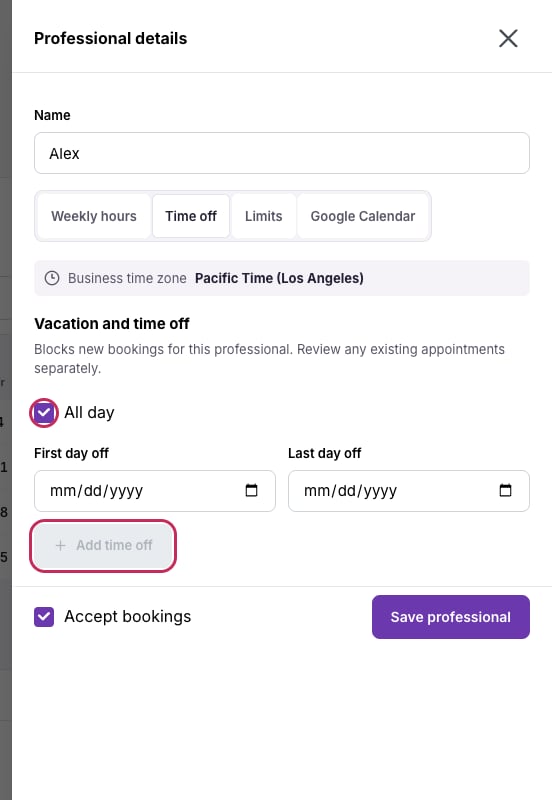
Add vacation dates or a partial-day absence, then save the professional.