1
Set the appearance
In the Appearance tab, choose a Date picker, an Accent color, and Button corners. Automatic uses a month calendar in the widget and a date strip on hosted service pages. You can also select Month calendar or Date strip for every installation. Use an accent dark enough to keep the button text readable.
2
Edit what customers read
Open the Text & languages tab. Search for a label, button, or message, or use Text section to find headings, steps, calendar labels, customer details, waitlist prompts, or confirmation messages. Use Edit copy for to choose a translation; the preview switches to that language. Select Use default to restore a field. Optional introductions, helper messages and timezone notes can be left blank to hide them. Footer visibility follows your plan, as described below.
3
Preview the flow
In Live preview, switch Preview flow between Available times, Approval required, and No available times. Use Preview language to see another language. On a phone, switch between Edit design and Preview.
4
Save the shared design
Click Save design, then open your actual booking link to check it as a customer. The preview uses sample availability and can be clicked through without creating appointments or sending emails.
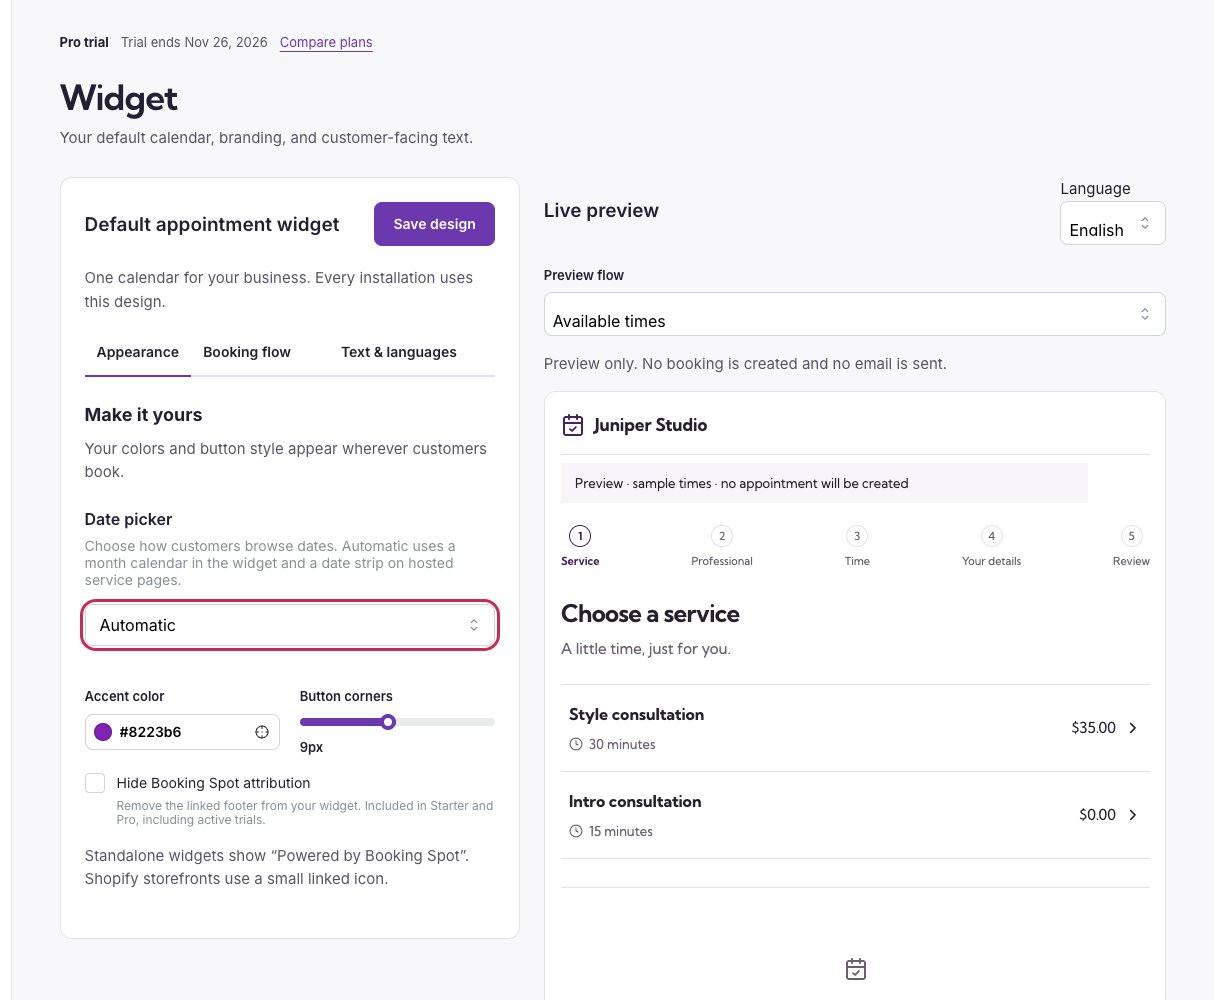
The live preview updates as you edit. Use Save design to apply the change to the shared calendar.
Booking Spot attribution
Free widgets include a linked attribution. Standalone widgets show Powered by Booking Spot. Shopify storefront widgets use a small 24×24 calendar icon with the same accessible label, following Shopify’s storefront branding requirements. The link opens the Booking Spot website in a new tab. On Starter or Pro, including an active paid-plan trial, open Widget → Appearance, select Hide Booking Spot attribution, then Save design. Leave it unchecked to keep the attribution. Free shows the setting disabled with a link to compare plans. You can translate the footer label in Text & languages → Widget footer. Free requires nonempty wording. Paid plans can also leave the footer text blank; the explicit visibility setting is the easiest way to remove it in every language. If a paid trial ends or you return to Free, attribution appears again. Your paid visibility preference is retained for a future upgrade. This setting controls the widget footer; the surrounding hosted booking page has its own footer.How customers choose a time
In the standard widget on a wider screen, the month calendar sits beside the available times. On a phone, times appear below the date picker. With Date picker → Automatic, hosted service pages keep their compact date strip. Choose a different layout in Appearance to use that layout everywhere. Each time button shows the appointment’s start and end time. Busy days show up to nine times per page: use More times and the previous arrow to see the rest. There is no separate scrolling time list. Your selected time stays visible above or beside Continue while you browse other times. Choosing another date or professional refreshes the times. If someone else takes a time before the customer reserves it, Booking Spot asks them to choose again. Booking Spot keeps overlapping appointments unavailable for that professional.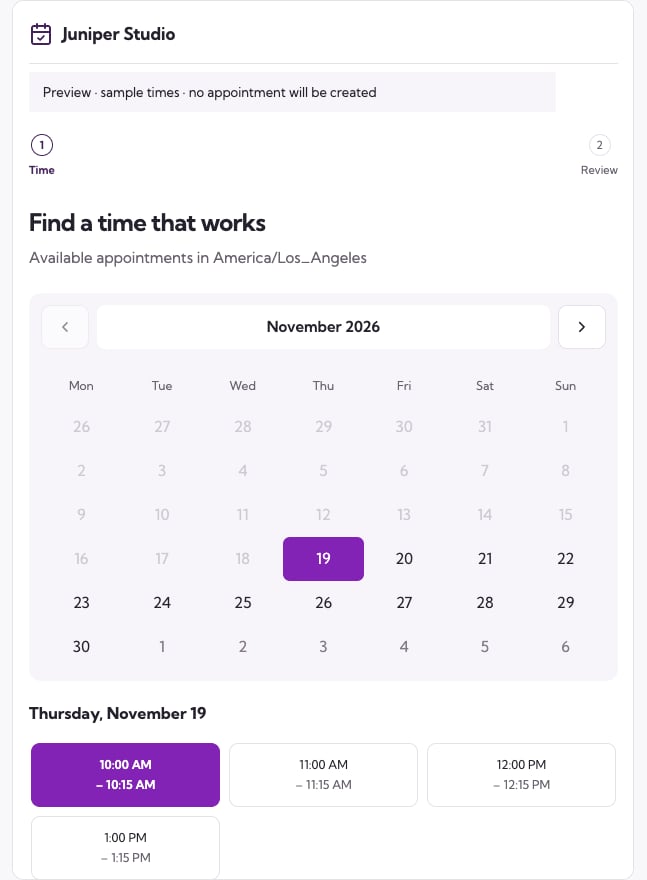
Choose a date and time without scrolling inside the time list. More times opens the next page.
A shorter flow for simple services
When the booking form has no additional questions and neither phone nor appointment notes is required, customers enter their name and email with the booking summary and confirm on the same screen. Optional phone and notes remain available under Add optional details. Any required cancellation acknowledgement still applies. By default, a single available service is selected automatically. If only one professional provides that service, customers go directly to choosing a time. You can turn either shortcut off in Booking flow. Services with additional questions, waivers or required phone or notes keep their details and review steps. Paid services use their configured payment flow after confirmation: Shopify checkout or cart, or the connected standalone payment provider. A free service confirms in Booking Spot without a Shopify order. Services requiring approval still create a booking request for your team to review.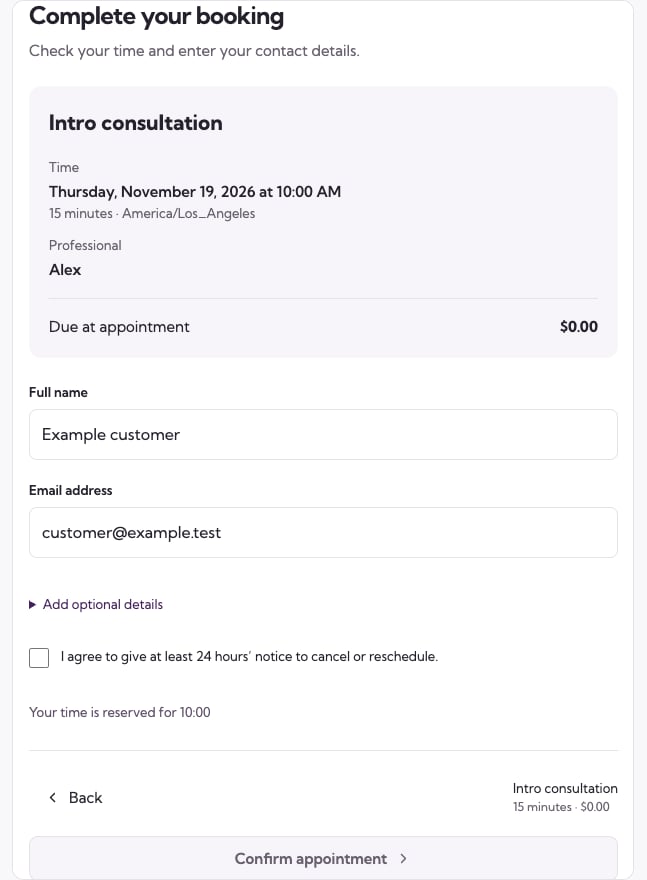
Simple services combine contact details and confirmation in one screen.
Choose your booking flow
Open Widget → Booking flow, change the options, then click Save design. Your Shopify blocks, hosted pages and shared calendar use the same settings. The live iframe preview updates as you change them; changing a flow option restarts the sample booking so you can try the new path.- Collect name and email before Shopify checkout is off by default. For paid Shopify services without intake questions, customers enter those details once at checkout. Required waivers and cancellation consent still appear before checkout. Turn this on if your team needs to collect contact details in the widget as well.
- Automatically select the only service is on by default. Customers go straight past the service choice when only one service is available on that page. Turn it off to show the service choice.
- Automatically select the only professional is on by default. If just one person offers the chosen service, Booking Spot selects them. Turn it off to let customers explicitly choose that person. Multiple services or professionals keep their normal choices.
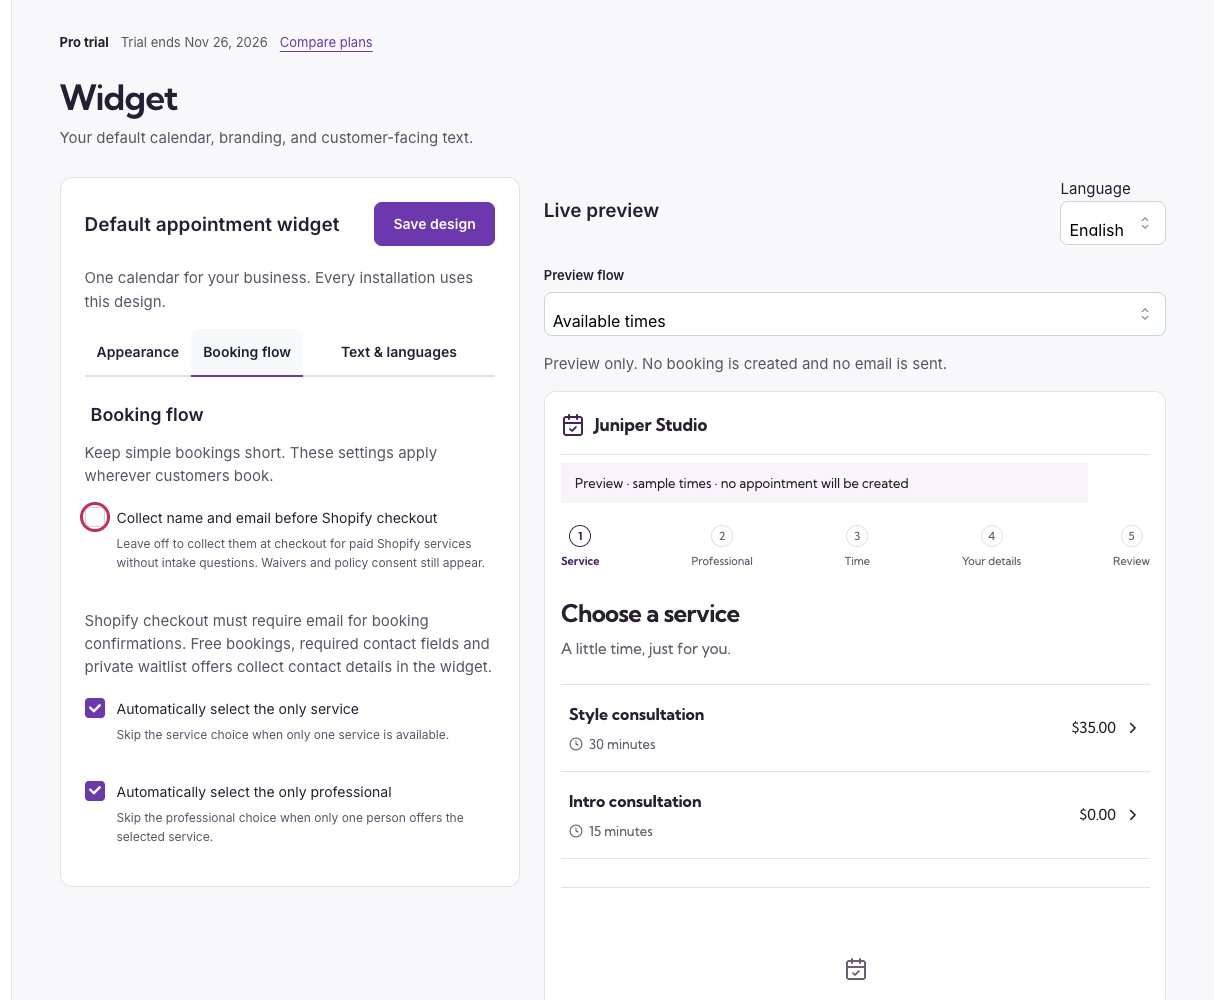
Choose where customers enter contact details and which single-choice steps to skip.